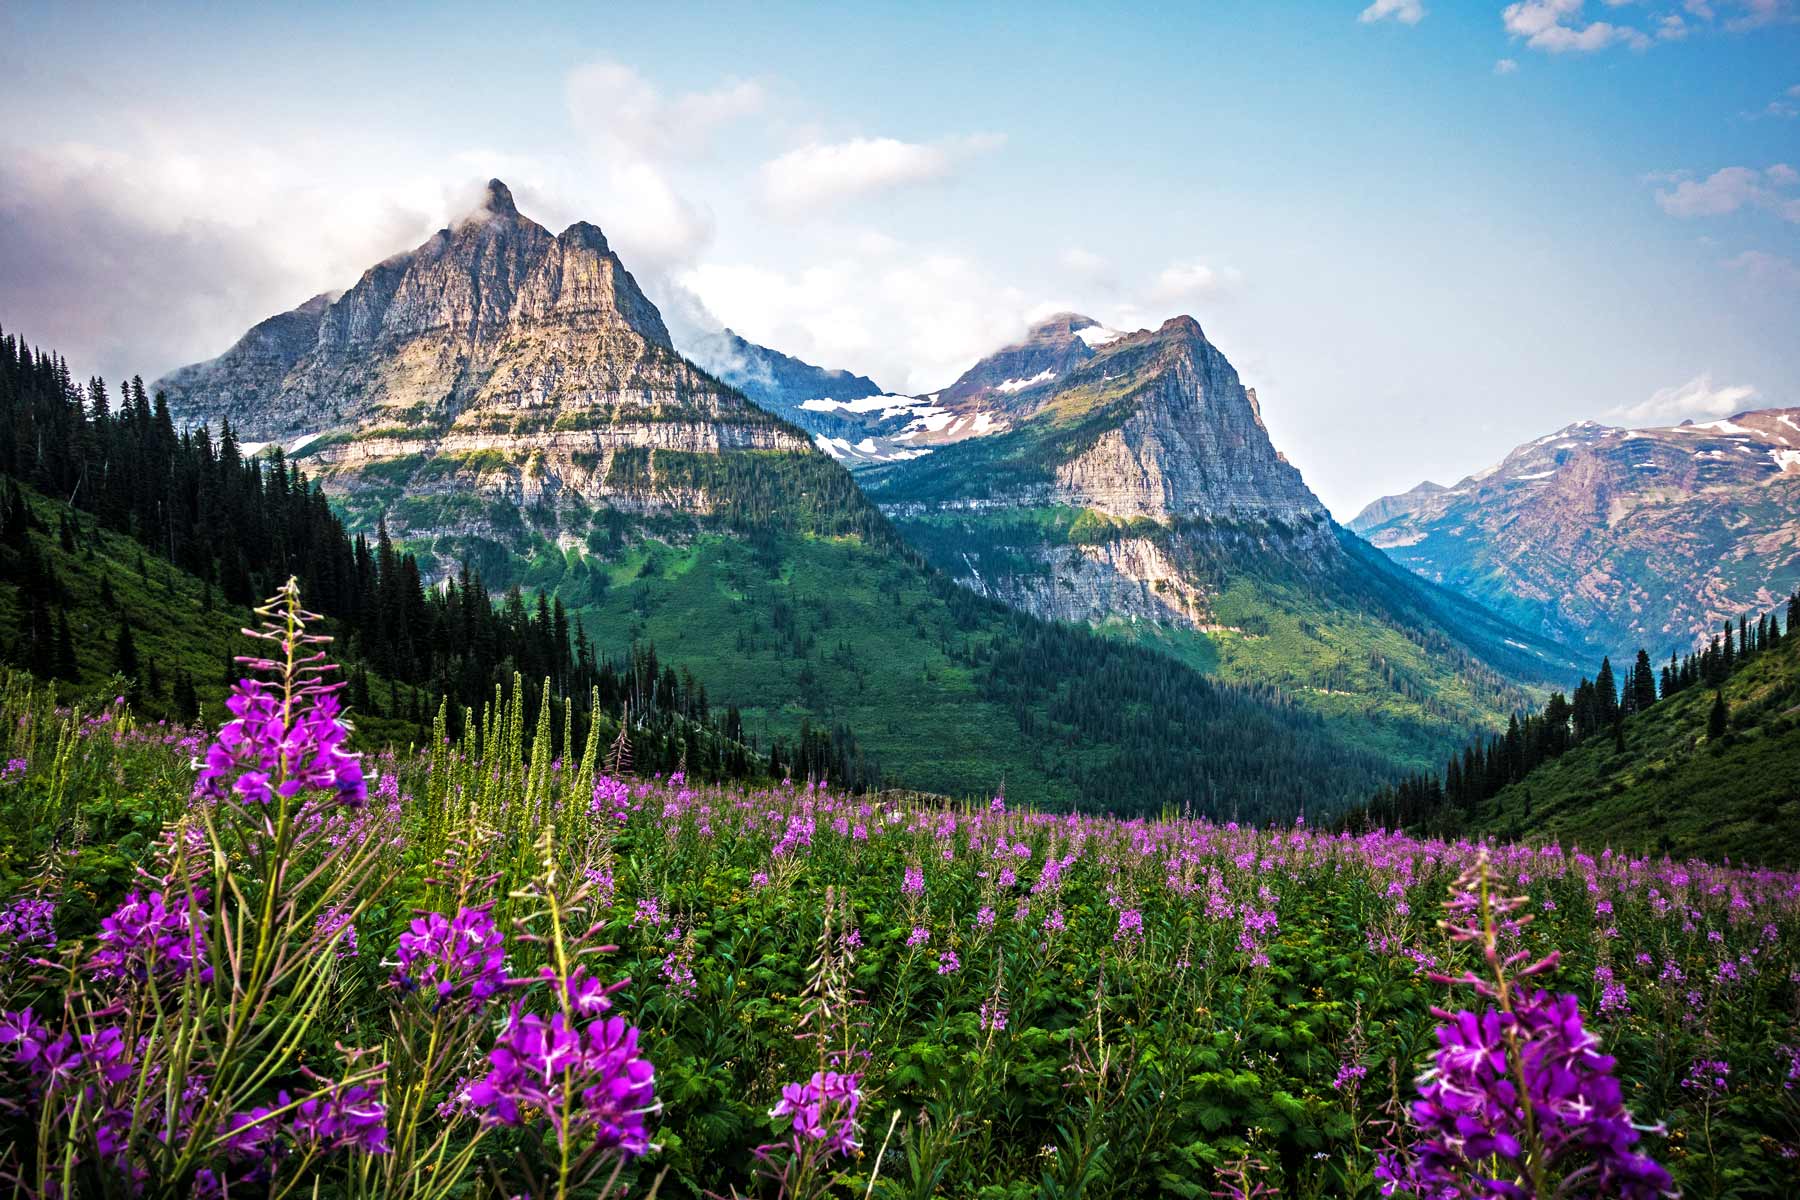
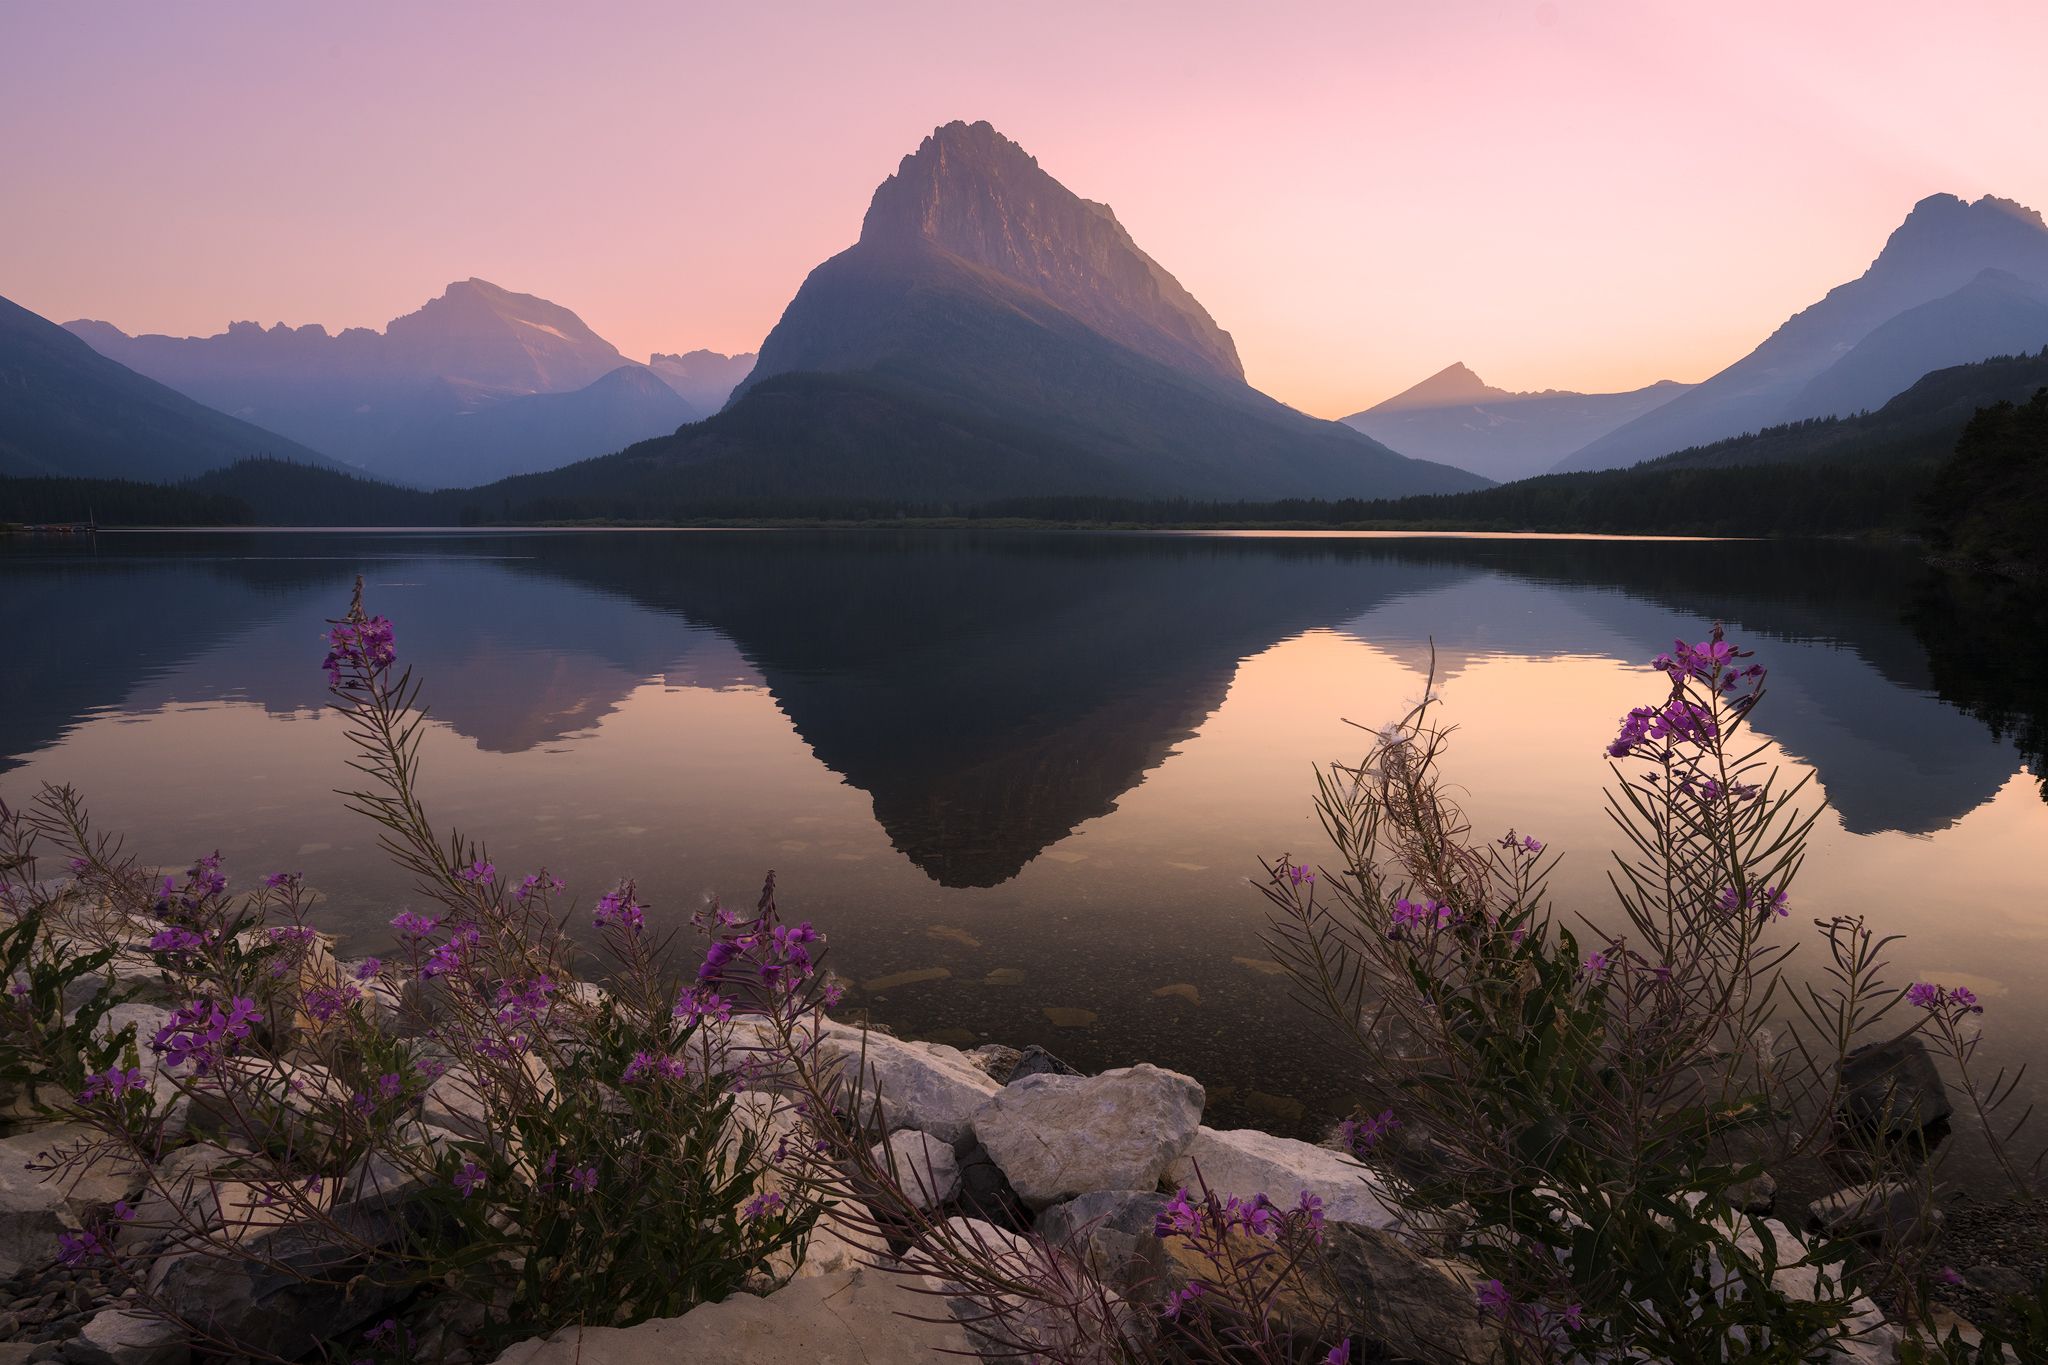
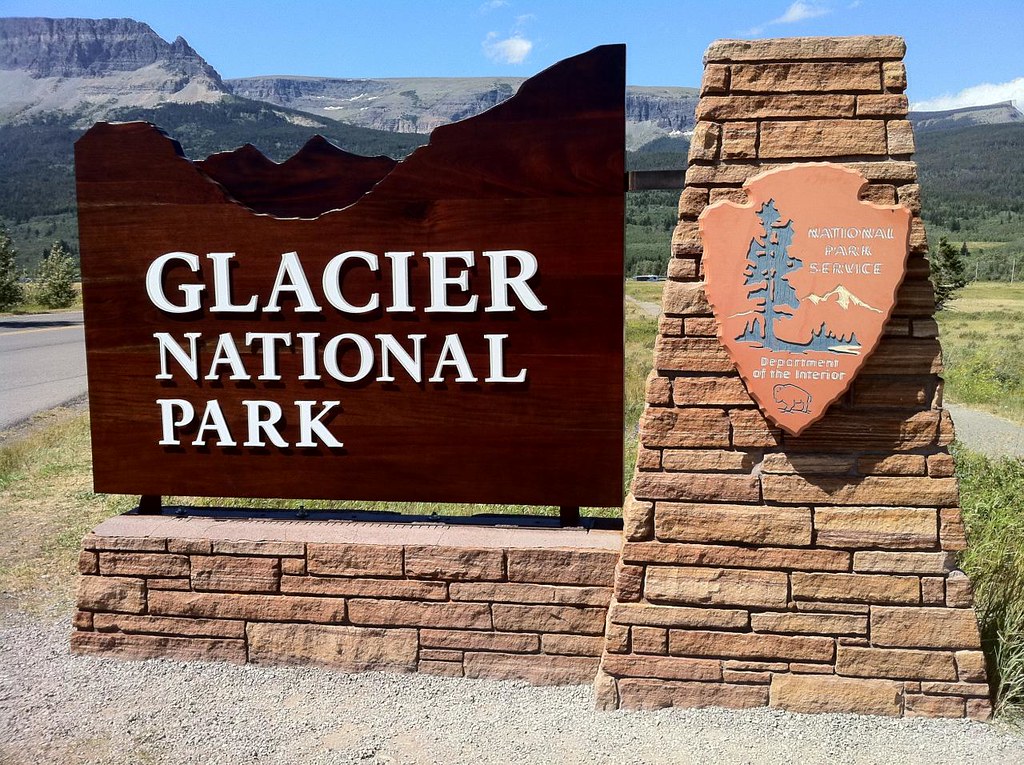
Cold mountain mist hits your face as you stand on a cliffside trail, watching a grizzly forage in the valley far below. The turquoise water of Lake McDonald sparkles under the morning sun, framed by perfectly polished, colorful river stones.
Unlike generic travel brochures, this glacier national park summer guide cuts through the noise to deliver hard-learned lessons on vehicle reservations, construction closures, and parking battles. I am here to save you from getting turned away at the gate or stuck in endless traffic.
You will easily decide exactly where to stay, which epic trails to hike, and how to navigate the park’s tricky shuttle systems.
Budget travelers can expect to spend around $150 per day camping, while mid-range lodge stays run about $350, and splurging on historic in-park chalets will push you past $600 daily.
The Quick-Start Glacier Planning Cheat Sheet
If you are short on time, here is the ultimate cheat sheet for your summer adventure. These are the absolute non-negotiables you need to lock in right now.
- Best Base Camps: Split your stay between Lake McDonald Lodge on the west side and Many Glacier Hotel on the east.
- Top Bucket-List Hikes: Tackle the cliffside Highline Trail for panoramic views, or hike to Grinnell Glacier to see active ice sheets.
- Smartest Transport Move: Book an iconic Red Bus Tour to navigate the terrifying drops of Going-to-the-Sun Road without the driving stress.
- Can’t-Miss Local Treat: Drive the rugged road to the off-grid Polebridge Mercantile for their legendary huckleberry bear claws.
- Essential Planning Tool: Download the Guide Along app before entering the park for offline, GPS-triggered audio guiding.
When is the Best Time to Visit Glacier National Park in the Summer?
The window for a full-access Glacier experience is deceptively narrow, typically spanning only from late June to early September. While the park technically remains open year-round, the high-altitude terrain that defines the “Crown of the Continent” is often buried under snow until the summer solstice.
I recommend targeting the second half of July through August if your primary goal is hiking the high-country trails, as this is when the snowpack finally retreats enough to clear the most iconic passes.
Understanding the Short Summer Season (Late June to Early September)
Planning a trip to Glacier requires accepting that Mother Nature dictates your itinerary more than any calendar. You should expect the Going-to-the-Sun Road (GTSR) to open its full length sometime between late June and mid-July, depending on the severity of the previous winter’s snowfall.
If you book for mid-June, you risk being limited to the lower-elevation valleys near Lake McDonald or St. Mary, as the high-mountain sections remain closed for plowing. Conversely, by early September, you may encounter the first major dustings of snow, which can trigger temporary road closures or limit access to higher trailheads.
Why Mid-August is the Peak Window for Hiking and Road Access
Mid-August is the “sweet spot” for visitors who want to maximize their time in the park. By this time, the backcountry trails are largely snow-free, and the park’s shuttle systems and visitor services are operating at full capacity.
However, this convenience comes with the reality of peak-season crowds. With over 3 million annual visitors, you must be prepared for parking lots at major trailheads to fill by mid-morning.
I suggest starting your day at sunrise—not just to beat the heat, but to secure a parking spot before the morning rush of day-trippers arrives.
Weather Realities: Packing for Sleet, Summer Heat, and Wildfire Smoke
Glacier’s weather is notoriously fickle; you can easily experience 80-degree heat in the valleys and freezing temperatures with sleet at Logan Pass on the same day. Do not let the summer label fool you—always pack high-quality, moisture-wicking layers and a dedicated rain shell.
Additionally, late summer (August into early September) is prime wildfire season in the Northern Rockies. While the park remains open, air quality can shift rapidly due to smoke from regional fires.
I recommend checking the official park website and local air quality monitors daily during your stay. If smoke becomes an issue, pivot your plans toward lower-elevation activities, such as boat tours or scenic drives in the Two Medicine area, which can sometimes remain clearer than the high-mountain corridors.
Pro Tip: Regardless of when you visit, download the Guide Along app before you enter the park. It uses GPS to trigger audio commentary as you drive, acting as a personal tour guide that works perfectly even in areas without cell service.
- For the best hiking access: Aim for mid-August.
- For fewer crowds: Target the very end of June or the first week of September, but accept that some high-elevation trails may be closed or snowy.
- For the best value: Expect to pay the standard $35 vehicle entrance fee during the summer season; purchase an annual pass if you plan to visit multiple national parks within a 12-month period.
How to Navigate the Glacier National Park Vehicle Reservation System
Securing a vehicle reservation is the single most important administrative step for your trip, as Glacier National Park has moved to a mandatory, timed-entry system for its most popular corridors. You must book these on Recreation.gov.
Reservations are released in two main windows: a block becomes available 120 days in advance, and a secondary, limited block is released at 7:00 p.m. MDT the day before your intended entry. Do not assume you can simply show up; without a reservation or a qualifying in-park booking, you will be turned away at the gate during peak hours.
The Rules for Driving Going-to-the-Sun Road (GTSR)
The Going-to-the-Sun Road is the park’s crown jewel, but it is strictly regulated to prevent gridlock. You need a specific vehicle reservation for the GTSR corridor to drive this route between late June and early September.
If you have a lodging, camping, or commercial tour reservation within the restricted zone, your confirmation serves as your entry pass—check your email for specific instructions, as these often include a digital gate code or a requirement to present your document at the entrance station.
North Fork & Polebridge Entrance Restrictions
The North Fork area, accessed via the Polebridge entrance, requires its own separate vehicle reservation. This area is rugged and remote, making it a favorite for those seeking solitude, but the limited parking at trailheads means the National Park Service enforces strict entry caps.
If you do not have a reservation for this specific sector, you will not be allowed to enter, regardless of whether you hold a pass for other parts of the park.
Many Glacier Construction Limitations & Hiker Shuttle Tickets
For the 2025 season, the Many Glacier valley is undergoing significant infrastructure work, which fundamentally changes how you access this iconic region. From July 1 through September 21, 2025, personal vehicle access is restricted.
You must book a seat on a temporary hiker shuttle via Recreation.gov to enter the valley for day use. If you have an existing reservation for lodging at the Many Glacier Hotel, or a pre-booked horseback or boat tour, you are exempt from the shuttle requirement and may drive in—just be prepared to show your confirmation at the gate.
Note that Swiftcurrent Motor Inn and Cabins will be closed for the duration of this project.
Pro Tips for Entering the Park Without a Vehicle Reservation
If you fail to secure a reservation, you are not necessarily barred from the park, but you must adjust your schedule to avoid the peak-demand windows. The vehicle reservation requirement is typically enforced between 6:00 a.m. and 3:00 p.m. daily.
By entering the park before 6:00 a.m. or after 3:00 p.m., you can bypass the reservation requirement entirely. I recommend the early-bird approach: arriving at the gate by 5:30 a.m. guarantees you a parking spot at high-demand trailheads like Logan Pass and allows you to experience the park in the quiet, golden light of dawn before the crowds arrive.
Insider Tip: Always download the Guide Along app before you lose cell service at the park entrance. It uses GPS to trigger audio commentary as you drive, which turns the long, winding stretches of the GTSR into an educational experience.
It is well worth the $12 investment for a stress-free, informed drive.
Getting Around: Should You Drive, Shuttle, or Take a Red Bus?
Navigating Glacier National Park requires a strategic mix of personal transport and public transit because the park’s million-acre span makes it impossible to see everything from behind a single steering wheel. While driving the Going-to-the-Sun Road (GTSR) is the quintessential Glacier experience, the sheer volume of visitors and limited parking at high-elevation trailheads can turn a scenic morning into a frustrating search for a stall.
I recommend prioritizing the park’s free shuttle system for mid-day transit to avoid the stress of the Logan Pass parking battle, reserving your personal vehicle for early-morning arrivals or accessing remote areas like the North Fork.
| Mode of Transport | Best For | Main Benefit | Booking Requirement |
|---|---|---|---|
| Personal Vehicle | Early birds and remote access | Total schedule flexibility | Vehicle reservation required (select areas) |
| Free Park Shuttle | Hikers and stress-free sightseeing | No parking headaches | None (first-come, first-served) |
| Red Bus Tours | History buffs and non-drivers | Guided, open-top views | Book months in advance |
The Reality of Driving Going-to-the-Sun Road (Is It Scarier Than It Looks?)
The GTSR is an engineering marvel that clings to cliff faces with narrow shoulders and limited guardrails, which can be intimidating for drivers who are nervous about heights. While the road is perfectly safe for standard passenger vehicles, it is undeniably narrow and features tight switchbacks that require your full attention.
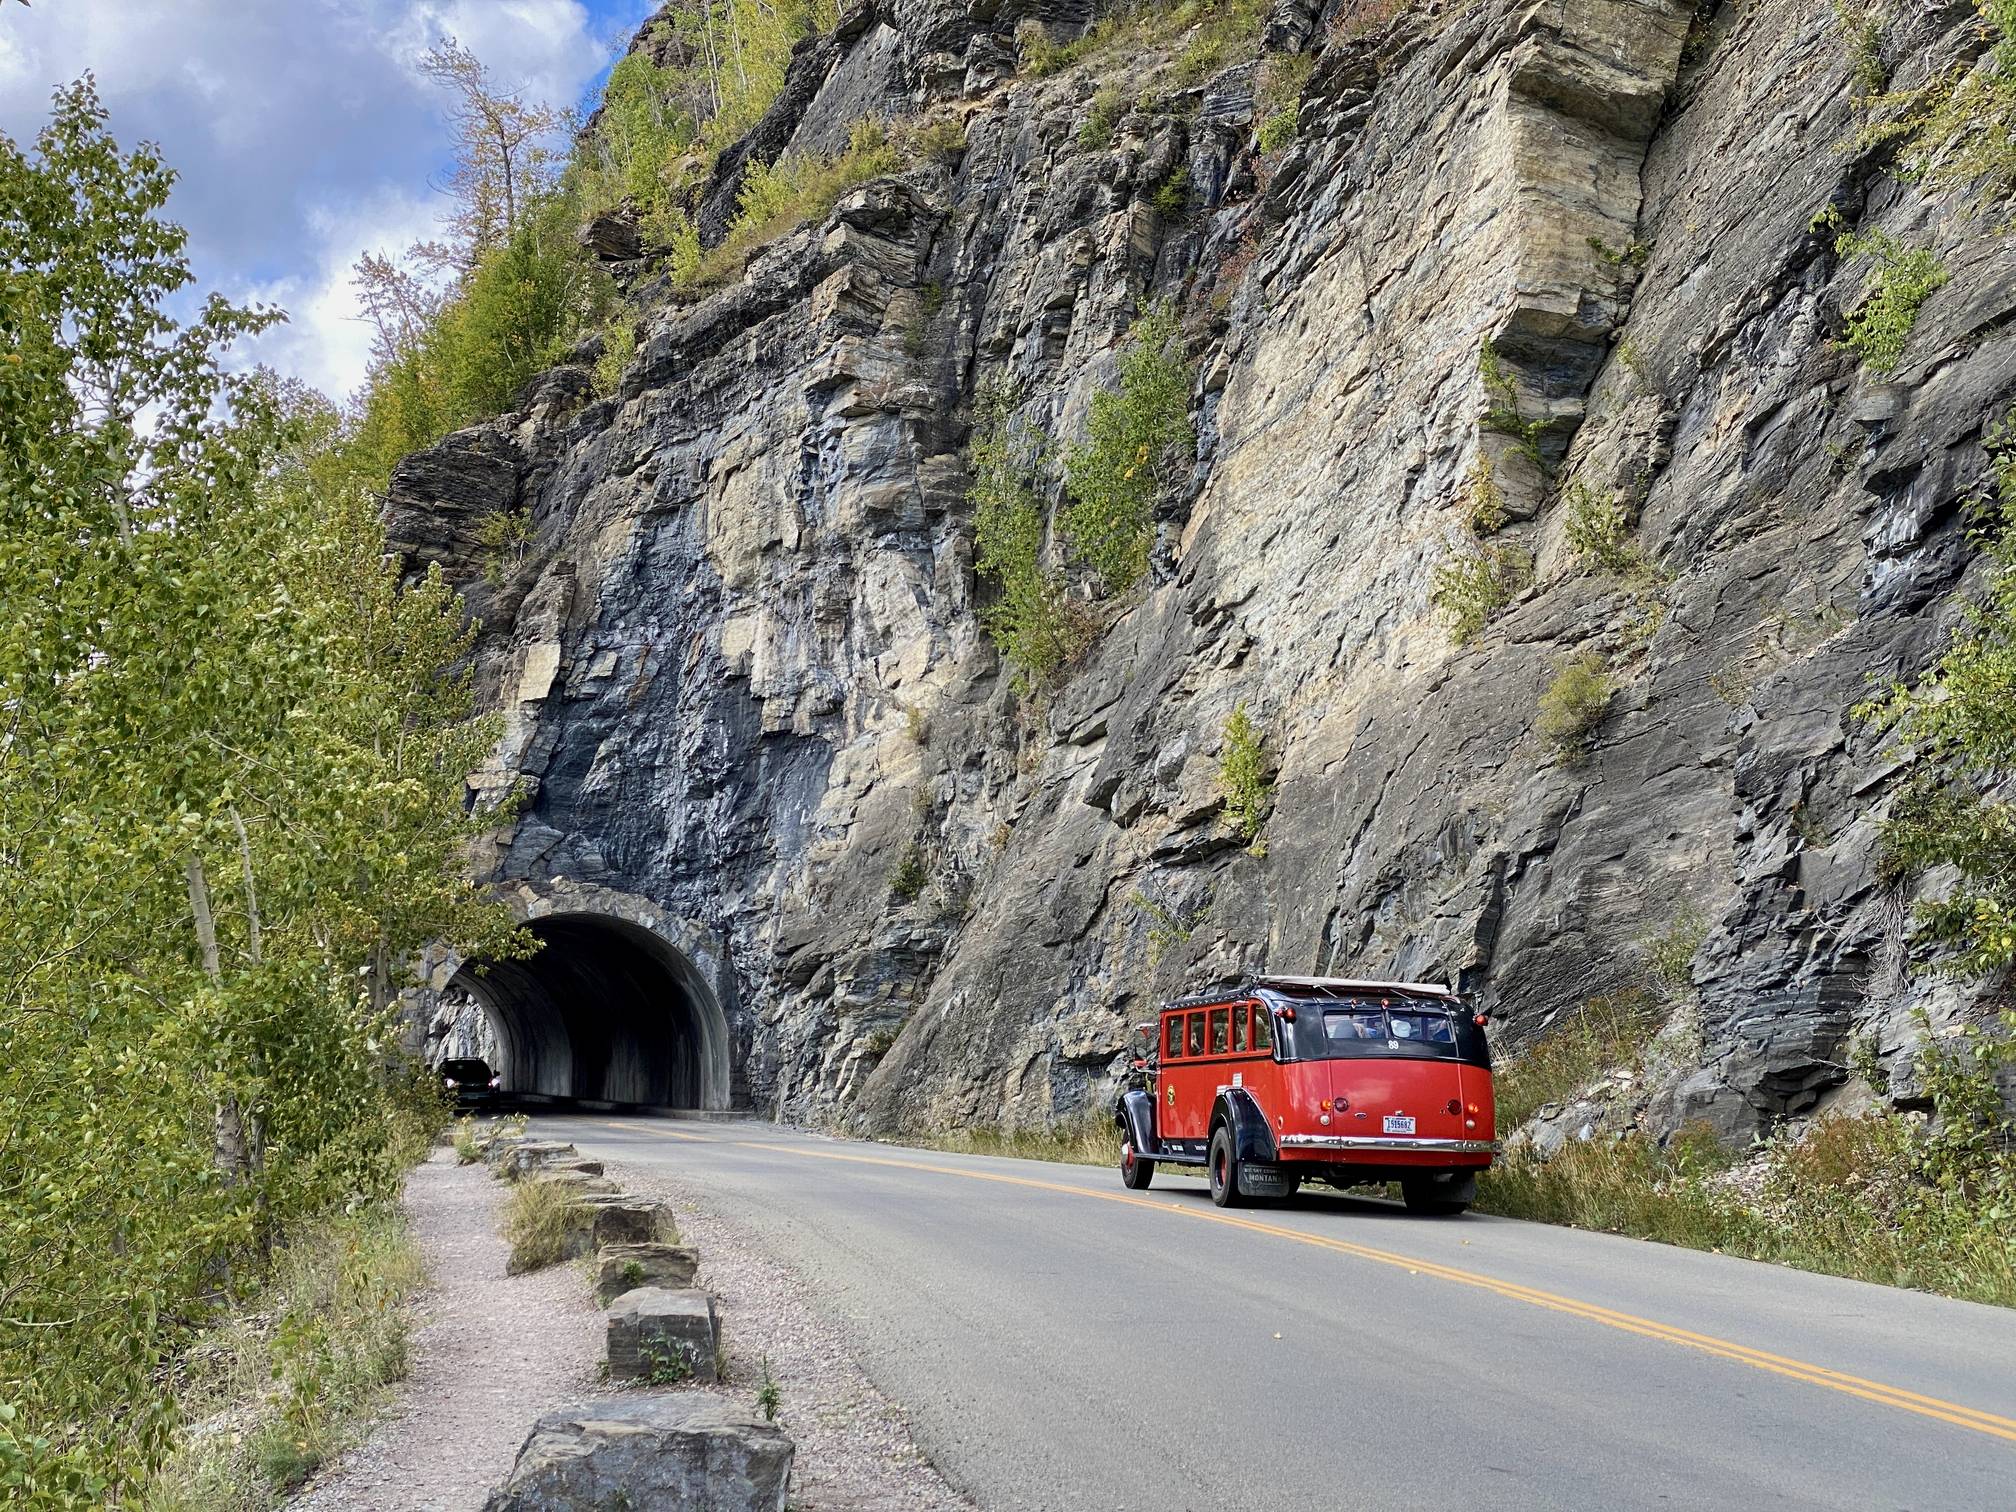
If you are prone to anxiety while driving on steep mountain passes, I recommend booking a seat on the iconic Red Bus Tours. These vehicles have been operating since the 1930s and provide a high-vantage, open-top perspective that allows you to enjoy the scenery without needing to watch the road.
If you do drive, download the Guide Along app; it acts as a GPS-triggered personal tour guide that provides context for the geology and history, making the drive feel much more manageable.
The Logan Pass Parking Battle: How to Secure a Spot
The parking lot at Logan Pass is the most sought-after piece of asphalt in the park, and it typically hits capacity by 7:00 AM or 8:00 AM during the peak summer season. If you are determined to drive your own car, you must arrive before sunrise to guarantee a spot.
If you arrive later and the lot is full, do not circle endlessly; instead, head to a lower-elevation trailhead or park at the St. Mary or Apgar visitor centers and utilize the free shuttle system to reach the pass. This saves you hours of frustration and keeps your day moving.
Free Park Shuttles vs. Paid Hiker Shuttles
The free park shuttle is the workhorse of the GTSR, running between major hubs like Apgar and St. Mary. It is the best choice for hikers who want to do one-way treks, such as the Highline Trail, where you can start at Logan Pass and end at The Loop.
Conversely, paid hiker shuttles are often required for specific construction-impacted areas like Many Glacier. Always check the current status on Recreation.gov, as shuttle requirements can change based on road construction and park maintenance schedules.
Key Driving Distances and Times Between Major Park Hubs
Glacier is deceptively large, and you should plan your itinerary around two distinct bases—one on the west side (Columbia Falls, Whitefish, or Kalispell) and one on the east side (Babb or St. Mary)—to minimize time spent in the car. Expect roughly two hours of driving time to traverse the entire GTSR from end to end, though this can double with heavy traffic.
Highway 2 serves as the primary year-round artery connecting the east and west sides of the park, but it is a long, winding route that should be factored into your travel time when moving between regions like Two Medicine and the west side.
Pro Tip: If you are staying in the Many Glacier area, factor in significant extra time for road access, as the entry road often faces construction limitations. Always confirm current road status on the National Park Service website before departing for the day.
Where Should You Stay? Best Lodging, Cabins, and Campgrounds
Because Glacier National Park spans over one million acres and takes roughly two hours to traverse via the Going-to-the-Sun Road, your choice of base camp dictates your entire experience. I recommend splitting your stay between the west and east sides of the park to minimize time spent behind the wheel and maximize your time on the trails.
| Location | Best For | Vibe |
|---|---|---|
| Many Glacier | Hardcore Hikers | Remote, rugged, high-wildlife activity |
| Lake McDonald | Classic Park Experience | Historic, bustling, lakeside access |
| West/Gateway | Logistics & Dining | Convenient, modern amenities |
| Two Medicine | Solitude Seekers | Quiet, scenic, off-the-beaten-path |
Iconic Historic Lodges and In-Park Accommodations
Staying inside the park boundary is the ultimate goal, but it requires booking months in advance. My pick for the most atmospheric stay is the Many Glacier Hotel; its location in the heart of the park’s best hiking makes it unbeatable, though you should expect a rustic, historic experience rather than modern luxury.
Note that the nearby Swiftcurrent Motor Inn and Cabins will be closed for the 2025 season due to construction.
On the west side, the Lake McDonald Lodge is an iconic, must-see property. If you prefer something more low-key, the Village Inn at Apgar and Apgar Village Lodge and Cabins offer direct access to the water.
For those exploring the southeast, Glacier Park Lodge remains a beautifully preserved piece of Great Northern Railway history. If you are looking for a modest, convenient base on the east side, consider the Rising Sun Motor Inn or St. Mary Village.
Historic Backcountry Chalets: Sperry and Granite Park
If you want to trade amenities for solitude, the park’s two historic backcountry chalets—Granite Park Chalet and Sperry Chalet—are the move. These are not hotels; they are remote, backpacking destinations accessible only by foot.
I recommend these only for experienced hikers who are prepared to carry their own gear and supplies into the wilderness. They offer an unparalleled, quiet connection to the mountains that you simply cannot get from a roadside lodge.
The Best Reservable Frontcountry Campgrounds
Camping is the most authentic way to experience Glacier, but sites fill up instantly when reservation windows open. Prioritize booking sites near your intended trailheads to avoid the morning parking scramble.
Always check the official National Park Service website for current status, as wildfire risk or maintenance can trigger sudden closures. I recommend arriving at your site early in the day to secure your spot and settle in before the afternoon heat sets in.
Gateway Towns: Staying in Columbia Falls, Whitefish, or Kalispell
When in-park lodging is sold out, the gateway towns of Columbia Falls, Whitefish, and Kalispell are your best alternatives. These towns provide the necessary infrastructure—grocery stores, gas, and diverse dining—that the park lacks.
For a unique, historic stay just outside the park, LOGE Glacier (formerly the Izaak Walton Inn) and the Belton Chalet are my top recommendations. These properties offer a perfect blend of historic charm and modern comfort, providing an excellent home base for your daily forays into the park.
Pro Tip: If you are planning a trip to the northern reaches, remember that the Prince of Wales Hotel is located across the border in Canada’s Waterton Lakes National Park. It is a stunning, historic property, but ensure you have your passport ready for the border crossing.
Top 10 Best Summer Hiking Trails in Glacier National Park
Glacier National Park is defined by its verticality, where the transition from lush valley floors to jagged, snow-dusted ridgelines happens in just a few miles of hiking. Choosing the right trail here is less about distance and more about managing your energy against the park’s significant elevation gains and unpredictable alpine weather.
| Trail Name | Difficulty | Best For | Key Highlight |
|---|---|---|---|
| Trail of the Cedars | Easy | Families/Recovery | Old-growth forest |
| Avalanche Lake | Moderate | Waterfall chasers | Cirque views |
| Grinnell Glacier | Challenging | Bucket-list seekers | Active glacier |
| Highline Trail | Challenging | Panoramic views | Cliffside path |
Best Easy Trails: Trail of the Cedars, Running Eagle Falls, and Apikuni Falls
For those looking to stretch their legs without committing to a full-day ascent, these paths offer high rewards for minimal effort. Trail of the Cedars is the park’s premier accessible boardwalk, perfect for a quiet morning stroll through ancient hemlocks and cedars. Running Eagle Falls is a must-see for its unique “trickle” feature where water emerges from a rock wall, while Apikuni Falls provides a short, steep, and rewarding burst of exercise that leads to a dramatic cascade in the Many Glacier area.
Moderate Day Hikes: Avalanche Lake, Hidden Lake Overlook, and Redrock Falls
These trails strike the balance between effort and scenery, though they require an early start to secure parking. Avalanche Lake is a classic for a reason; the hike through the forest ends at a stunning basin fed by multiple waterfalls. Hidden Lake Overlook, starting from Logan Pass, is my pick for wildlife spotting—expect to see mountain goats and bighorn sheep near the boardwalk. Redrock Falls is an excellent, lower-elevation alternative in Many Glacier if you want to avoid the intense vertical climbs of the nearby glacier trails.
Challenging Bucket-List Treks: Grinnell Glacier, Iceberg Lake, and Ptarmigan Tunnel
If you have the fitness and the time, these three trails represent the absolute pinnacle of Glacier hiking. Grinnell Glacier is the park’s crown jewel, offering up-close views of an active glacier and turquoise meltwater lakes. Iceberg Lake is famous for its namesake ice chunks that float well into the summer, while Ptarmigan Tunnel offers a unique, man-made passage through a mountain ridge that opens up to spectacular views of the Belly River country. These are strenuous, full-day commitments; bring bear spray and plenty of water.
Highline Trail vs. Siyeh Pass: Which Scenic Ridge Hike is Right for You?
Both trails offer world-class, high-altitude exposure, but they serve different goals. The Highline Trail is the definitive Glacier experience, hugging a cliffside with constant, sweeping views of the Continental Divide; it is best for those who want maximum “wow” factor without a massive initial climb. Siyeh Pass is the better choice if you prefer a more rugged, solitary experience that rewards you with a massive, high-altitude traverse and a descent through a stunning alpine meadow.
I recommend the Highline for your first visit, but save Siyeh Pass for when you want to escape the crowds.
How to Shave Miles Off Your Hikes Using Glacier’s Boat Tours
Strategic use of the park’s concession-operated boat tours can save your legs and maximize your time on the trail. By taking a boat across Swiftcurrent and Josephine Lakes in the Many Glacier area, you can shave approximately two miles off each way on the Grinnell Glacier Trail.
This is a game-changer for families or those who want to spend more time photographing the glacier and less time hiking the lower forest sections. Always book these tickets well in advance, as they sell out months before the summer season begins.
Pro Tip: Regardless of the trail, always check the park’s current trail status page before heading out. Snow can linger on high-elevation passes like the Highline or Ptarmigan Tunnel well into July, making them impassable without proper gear and experience.
For the best experience, base yourself in a Many Glacier lodge or cabin if you plan to tackle the big glacier hikes, or stay in West Glacier if you want easier access to the Avalanche Lake and Logan Pass trailheads.

Beyond Hiking: Other Must-Do Summer Activities
Glacier National Park is vast, and while the trails are the main draw, the park’s sheer scale makes passive sightseeing and river-based adventures essential for a balanced itinerary. Whether you are looking to rest your legs after a grueling climb or want to experience the landscape without the stress of navigating mountain traffic, these activities provide a necessary change of pace.
| Activity | Best For | Main Benefit |
|---|---|---|
| Red Bus Tours | History lovers & nervous drivers | Stress-free views of GTSR |
| Boat Cruises | Families & photographers | Access to remote shoreline views |
| Flathead Rafting | Adrenaline seekers | Cooling off on hot summer days |
| Polebridge Run | Foodies | The region’s best pastry |
Classic Sightseeing: Historic Red Bus Tours and Scenic Boat Cruises
The iconic Red Bus Tours are the gold standard for sightseeing in Glacier. These open-top vehicles have been operating since the 1930s, and I recommend them specifically for anyone who finds the narrow, cliff-hugging sections of the Going-to-the-Sun Road (GTSR) intimidating.
You get the full panoramic experience without having to keep your eyes glued to the road. Because these tours fill up months in advance, check the official concessionaire’s website early to secure your seat.
For a different perspective, scenic boat cruises are available on several of the park’s major lakes. These are excellent for capturing the scale of the surrounding peaks from the water, which is often a more peaceful experience than the crowded trailheads.
I suggest booking these for the morning or late afternoon to catch the best light for photography.
Outdoor Adventures: Rafting the Flathead River and Horseback Riding
When the summer heat peaks, the best place to be is on the water. Commercial rafting trips on the Middle Fork and North Fork of the Flathead River offer a refreshing way to see the park’s boundaries.
These rivers are part of the Flathead Wild and Scenic River system, and the rapids range from mild to moderate depending on the season’s snowmelt. I recommend booking with a park-permitted outfitter; check the National Park Service’s official rafting webpage for the most current list of authorized operators.
A Culinary Pilgrimage: Huckleberry Bear Claws at Polebridge Mercantile
No trip to the North Fork area is complete without a stop at the Polebridge Mercantile. Established in 1914, this off-grid general store is a local institution.
The main reason to visit is the huckleberry bear claw—it is legendary for a reason. My advice is to arrive early in the morning, as the line can stretch out the door by midday during the peak summer season. Pro tip: Always buy more bear claws than you think you can eat.
You will regret it if you don’t.
If you are basing your stay in the North Fork or near the West Entrance, this is a perfect morning excursion. For those staying in gateway towns like Columbia Falls or Whitefish, the drive to Polebridge is a commitment, so combine it with a day of exploring the quieter, less-trafficked corners of the park.
Final Decision Factor: If you are short on time, prioritize the Red Bus Tour for the sheer convenience of navigating the park’s most famous road. If you have extra time, the huckleberry bear claw at Polebridge is the single most essential “local” experience you can have outside of the park’s main gates.
What to Pack for a Summer Trip to Glacier: The Ultimate Checklist
Packing for Glacier in the summer requires preparing for four seasons in a single day, as temperatures at Logan Pass can hover near freezing even while the valleys bake in the mid-80s. I recommend a “system” approach rather than just throwing clothes in a bag: prioritize moisture-wicking synthetic or wool base layers, a high-quality insulating mid-layer, and a reliable waterproof shell.
Do not rely on cotton, which stays wet and cold if you get caught in a sudden mountain rainstorm.
Essential Gear to Carry in Your Hiking Hydration Backpack
Your daypack is your lifeline in the backcountry, so keep it stocked with the ten essentials to ensure you aren’t caught off guard by the park’s rapid weather shifts or remote terrain.
- Hydration Reservoir: Carry at least 2–3 liters of water capacity, as many high-elevation trails lack reliable refill points.
- Navigation: Download offline maps (like AllTrails or Gaia GPS) and carry a physical paper map of the park, as cell service is non-existent in most canyons.
- Sun Protection: The high-altitude sun is punishing; pack polarized sunglasses, high-SPF sunscreen, and a brimmed hat.
- Headlamp: Even if you plan to return before dark, keep a headlamp with fresh batteries in your pack for unexpected delays.
- First Aid Kit: Include moleskin or blister pads, as the steep, rocky terrain of Glacier is notorious for causing hot spots on your feet.
Clothing Layers for Rapid Mountain Weather Transitions
The secret to staying comfortable in Glacier is the “three-layer rule.” I recommend wearing a synthetic base layer, carrying a fleece or lightweight down jacket for stops, and always having a seam-sealed rain jacket accessible in an outer pocket.
- Base Layer: Merino wool or synthetic tees that dry quickly.
- Mid-Layer: A lightweight “puffy” jacket or heavy fleece; these are essential for the wind-whipped summit of Logan Pass.
- Outer Shell: A dedicated rain jacket is mandatory, not optional. Even on blue-bird days, mountain storms develop in minutes.
- Footwear: Sturdy, broken-in hiking boots with aggressive tread are non-negotiable for the loose scree found on most iconic trails.
Bear Spray 101: How to Carry, Buy, and Use It Safely
Carrying bear spray is not a suggestion in Glacier; it is a fundamental responsibility for anyone entering the backcountry. I recommend buying your canisters locally at gateway towns like Columbia Falls or West Glacier rather than trying to fly with them, as TSA prohibits bear spray in both carry-on and checked luggage.
How to Carry: Never keep your bear spray inside your backpack. It must be in a holster on your belt or strapped to the chest strap of your pack where you can reach it in under two seconds.
If you have to take your bag off to get to your spray, it is useless in a surprise encounter.
How to Use: Practice removing the safety clip while you are at your trailhead or parking area. When deploying, aim slightly downward to create a cloud that the bear must run through, rather than trying to hit a moving target directly in the face.
Always hike in groups of three or more, and make plenty of noise—especially near running water or around blind corners—to avoid startling a bear in the first place.
Summary for Success: Your pack should be light enough for a full day of movement but heavy enough to handle a sudden drop in temperature. If you are basing yourself in gateway towns like Columbia Falls or Whitefish, use your morning coffee time to double-check your pack weight and ensure your bear spray is accessible before you hit the park entrance.
An Ideal 8-Day Summer Itinerary: Splitting Your Stay to Avoid Burnout
Glacier National Park spans over one million acres, and attempting to see it from a single base is a logistical mistake that will leave you spending more time behind the wheel than on the trail. Because it takes roughly two hours to traverse the park via Going-to-the-Sun Road, I recommend splitting your stay into three distinct geographic hubs to minimize daily driving and maximize your time in nature.
Days 1-3: Exploring West Glacier, Columbia Falls, and Lake McDonald
Base yourself in Columbia Falls or near the West Glacier entrance to secure easy access to the park’s most iconic water features. This area is perfect for travelers who want a mix of park proximity and town amenities like breweries and grocery stores.
Spend your first three days acclimating to the park’s scale by exploring the shores of Lake McDonald and the surrounding Apgar area. Use this time to hike the lower-elevation trails near the lake before heading deeper into the mountains.
I recommend checking into Apgar Village Lodge and Cabins or The Village Inn at Apgar for the best morning access to the park entrance. If you prefer a historic atmosphere, Lake McDonald Lodge is a must-see, even if you are just stopping by to admire the architecture.
Days 4-6: Many Glacier Wildlife Spotting and Epic Hikes
Transition to the east side of the park, near Babb, to access the Many Glacier valley. This is the crown jewel for wildlife enthusiasts and serious hikers.
Many Glacier is home to some of the park’s most legendary trails, such as the trek to Grinnell Glacier, Ptarmigan Tunnel, and Iceberg Lake. Note that the Swiftcurrent Motor Inn and Cabins will be closed for the 2025 season due to construction, so prioritize booking a room at the Many Glacier Hotel early; it is widely considered one of the best lodges in the entire National Park System.
Because this area is a magnet for grizzly bears and mountain goats, always carry bear spray and check with rangers regarding current trail closures before heading out.
Days 7-8: Two Medicine Valley and Scenic Detours
Conclude your trip in the Two Medicine Valley, the park’s quieter, southeastern corner. This area offers a dramatic change of pace from the busier west side and is ideal for those who prefer solitude and rugged, high-alpine scenery.
To get here from the Babb area, I recommend taking the scenic route via Highway 89 rather than the faster Highway 2. It offers spectacular ridgeline views and is significantly less nerve-wracking than the cliff-hugging sections of Going-to-the-Sun Road.
For your final nights, consider staying at Glacier Park Lodge in East Glacier. It is a historic marvel and serves as the perfect base for your final hikes in the Two Medicine area, which many visitors find to be the most underrated and rewarding section of the park.
Pro Tip: When planning your dining, do not assume local spots stay open late. Many popular establishments, such as Backslope Brewery, often close by 8:00 PM.
Always check operating hours in the afternoon so you aren’t left without dinner after a long day on the trails.
What are the Park Fees, Passes, and Pet Rules?
Navigating the logistics of Glacier National Park requires knowing exactly what your wallet needs to handle before you reach the gate, as the park’s fee structure is designed to reward frequent visitors while managing the massive summer crowds. Entrance fees for standard passenger vehicles are typically $35, which grants you access for seven consecutive days.
If you are arriving by motorcycle, the fee is $30, and those entering on foot or by bicycle pay $20. I recommend checking the official National Park Service website immediately before your trip, as these rates can fluctuate based on the season.
Standard Entrance Fees vs. America the Beautiful Passes
Deciding between a single-entry fee and an annual pass is the first financial decision you should make. If you plan to visit Glacier for more than two days or intend to visit other national parks within the same year, the America the Beautiful Pass is the clear winner.
At $80, this pass covers entrance fees for an entire vehicle at all national parks and federal recreation sites for a full year. In contrast, a Glacier-specific annual pass costs $70; unless you are certain you will only visit Glacier and no other federal lands, the $10 upgrade for the national pass provides significantly better value.
Seniors have the best deal of all, with lifetime access available for $80 or an annual option for $20.
Crucial Pet Restrictions: Where Dogs Can and Cannot Go
Glacier National Park is strictly managed to protect wildlife, which means the rules for pets are incredibly restrictive compared to other outdoor destinations. Dogs are prohibited on all park trails, on boardwalks, and in the backcountry, as their presence can stress native wildlife and attract predators like grizzly bears.
You may only have your pet with you in developed areas, such as parking lots, campgrounds, and paved roads. If you are traveling with a dog, I advise against planning a hiking-heavy itinerary unless you have a reliable plan for pet boarding or a partner who can stay behind with the animal.
For those who must bring a pet, keep them leashed at all times within the designated vehicle-accessible zones, and never leave them unattended in your car, especially during the heat of the summer season.
Pro Tip: Do not rely on finding pet-friendly options inside the park boundaries. If you are basing your trip in gateway towns like Columbia Falls or Whitefish, confirm pet policies with your lodging provider well in advance, as many historic mountain inns have limited rooms designated for guests with animals.
Frequently Asked Questions
How many days do I need to see the park properly?
I recommend a minimum of four to five days to truly experience the park without rushing. Because the park is so spread out, you should plan to split your stay between the west side (near West Glacier or Columbia Falls) and the east side (near St. Mary or Babb).
This minimizes the two-hour drive required to cross the park via Going-to-the-Sun Road, allowing you to spend more time on the trails and less time behind the wheel.
Is it worth buying an annual park pass?
If you plan to visit Glacier for more than two days, the $35 standard seven-day vehicle pass is the baseline, but I strongly recommend purchasing the “America the Beautiful” National Parks Pass for $80. It covers entrance fees for all national parks and federal lands for a full year.
If you are only visiting Glacier and no other federal sites, the Glacier-specific annual pass is $70, which pays for itself if you visit twice in one season.
What is the best way to navigate the park roads?
Download the Guide Along app before you arrive. It costs roughly $12 and provides a GPS-triggered audio tour that works even without cell service.
It is far more engaging than a standard map and provides context for the geology and history of the Going-to-the-Sun Road as you drive. For navigation, do not rely on cellular data, as service is non-existent throughout much of the park interior.
Are there any major closures I should know about for 2025?
Yes, specifically for the Many Glacier area. The Swiftcurrent Motor Inn and Cabins will be closed for the 2025 season due to a construction project.
If you were planning to base yourself in that specific complex, you will need to look at alternative lodging options like Many Glacier Hotel or gateway accommodations in Babb.
What should I do if I want to go rafting?
Rafting the Middle Fork or North Fork of the Flathead River is a highlight of a summer trip. Because these rivers are designated as Wild and Scenic, you must book through a commercially permitted operator.
Check the official National Park Service rafting webpage for the current list of authorized companies to ensure your trip is legitimate and safe.
Summary: To win at Glacier, prioritize a split-stay itinerary to reduce driving, book your lodging well in advance to account for seasonal construction closures, and invest in a digital guide app to make the most of your time on the road.
How to Make Your Glacier Summer Trip a Reality
Your very first step is to hop onto Recreation.gov to secure your vehicle reservations and book seats on the Many Glacier hiker shuttle. After that, download the Guide Along app so you have your offline audio tour ready to go before you lose cell service.
Standing on the Continental Divide with glaciers gleaming in the distance is a soul-stirring experience that you will remember for the rest of your life.
Grab your calendar, map out your eight-day split itinerary, and start locking in those historic lodge reservations today.
Leave a Reply